
Configure shipping zones and rates
Our Shopify app acts as a "carrier service", which means only shipping rates created by our app will include duties and taxes. To use a carrier or shipping app in Shopify, you need to configure both Markets and Shipping zones. Markets control where a store sells, while shipping zones control where shipping rates are available. Shopify requires a country or region to belong to an active market before it can be used in Shipping and delivery settings.
Creating markets and shipping zones
Create a Shopify market
First you will need to create a market for each country that you want to ship to. You can do this by following the "Create market" instructions in Shopify's documentation here.
You can view a list of our supported destination countries here.
Create shipping zones
With markets created, you will need to configure your shipping zones (skip this section if you have already configured shipping zones):
-
In Shopify admin, go to Settings > Shipping and delivery.
-
In the Shipping section, click the shipping profile you want to configure.
-
Choose the correct profile:
- Use the general shipping profile if the same shipping logic applies to most products.
- Use a custom shipping profile if certain products need separate shipping rules, such as oversized, fragile, or warehouse-specific items.
-
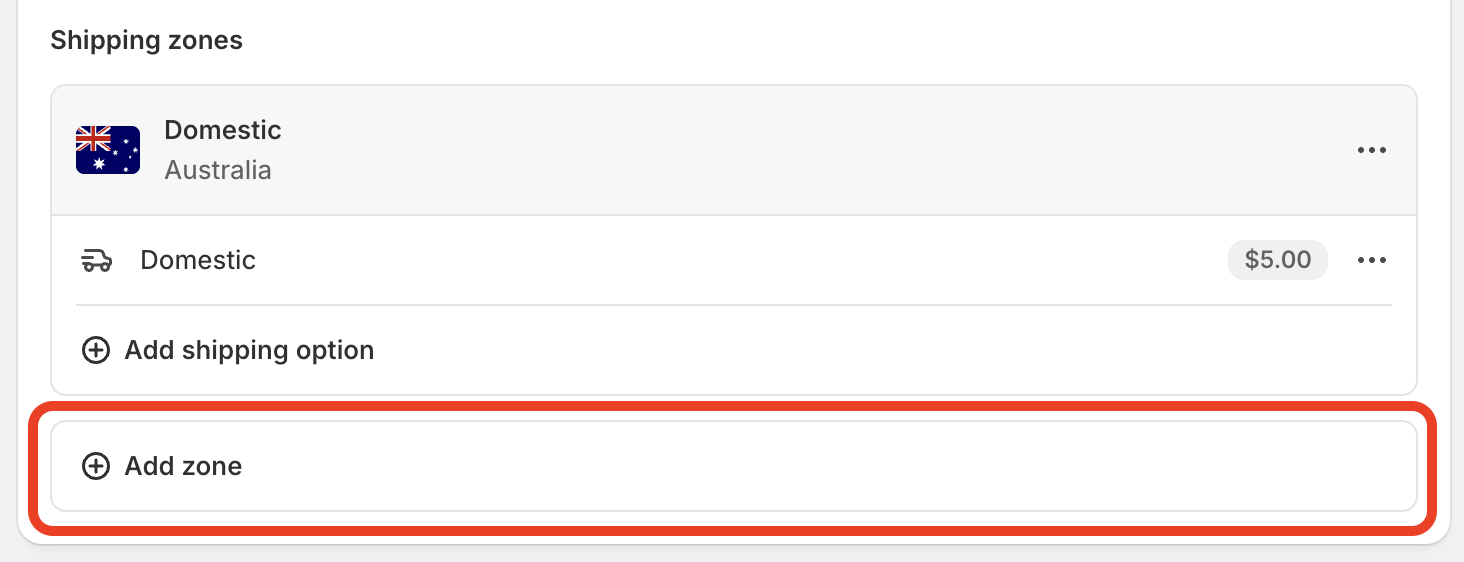
In the chosen shipping profile, click Add shipping zone next to the relevant group of fulfillment locations:
-
Enter a name for the shipping zone and select the countries and regions to include.
-
Click Done and Save.
Only countries and regions that already belong to a market are available to add to shipping zones. If a destination does not appear here, the merchant should check Settings > Markets first.
Creating shipping rates
After creating the shipping zones, navigate back to the Dutify app to create the shipping rates:
-
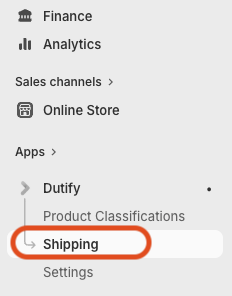
In Shopify admin, click the Dutify app and go to Shipping:
-
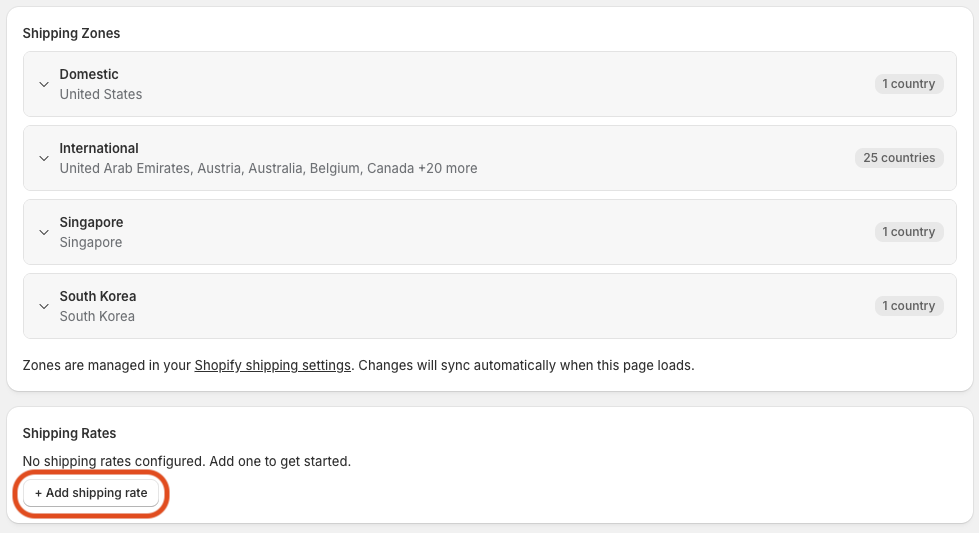
Scroll down the page and you should see the shipping zones that you have created, in the section below click Add shipping rate:
-
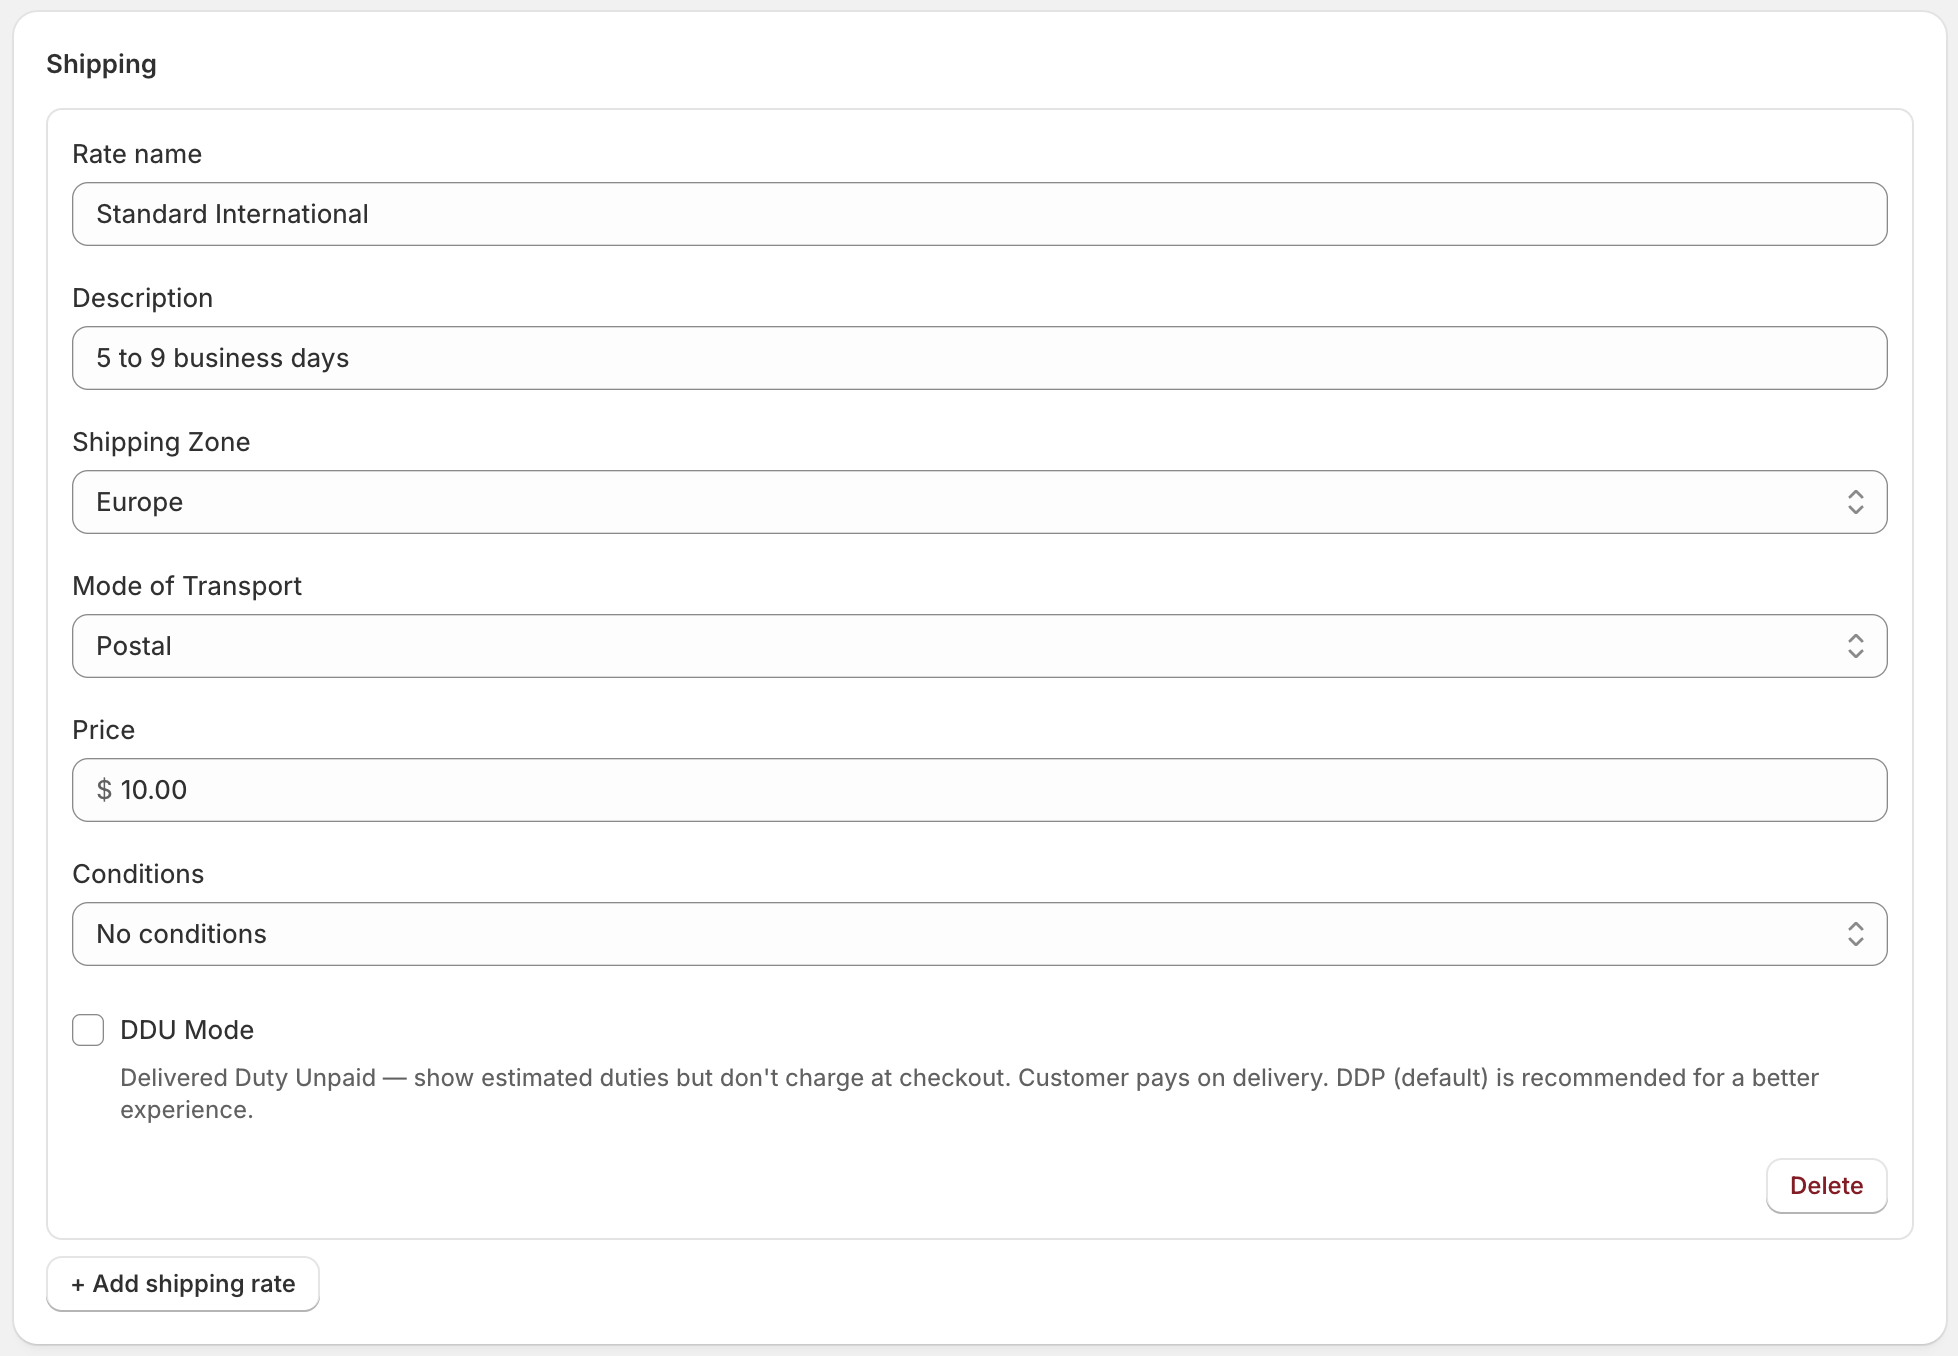
Enter the the following information and then click Save:
- Rate name - the name of the shipping rate shown in the checkout.
- Description - additional text also shown in the checkout, this is typically used to specify delivery estimates.
- Shipping Zone - determines which shipping zone the rate will be available for.
- Mode of Transport - this can be
postalcourierorfreightand is used to calculate the correct duty and tax.- Postal is used when you are shipping through the postal network such as Australia Post or Royal Mail.
- Courier is used when you are shipping through an express carrier such as FedEx, UPS or DHL.
- Freight is used when you are shipping cargo containers, typically wholesale B2B.
- Price - the shipping price that your customer will pay, in the default store currency.
- Currency conversion - controls whether the duty and tax values are displayed in the store's currency or the customer's local currency.
- Conditions - allows you to create weight or value based conditions for which the rate will apply. If set to
No conditionsthe rate will be available regardless of weight or value. - DDU mode - if enabled, the duty and tax will be shown in the shipping description in your checkout, but will not be charged. Use this if you want to show duty and tax but not charge it.
Example shipping rate configuration
-
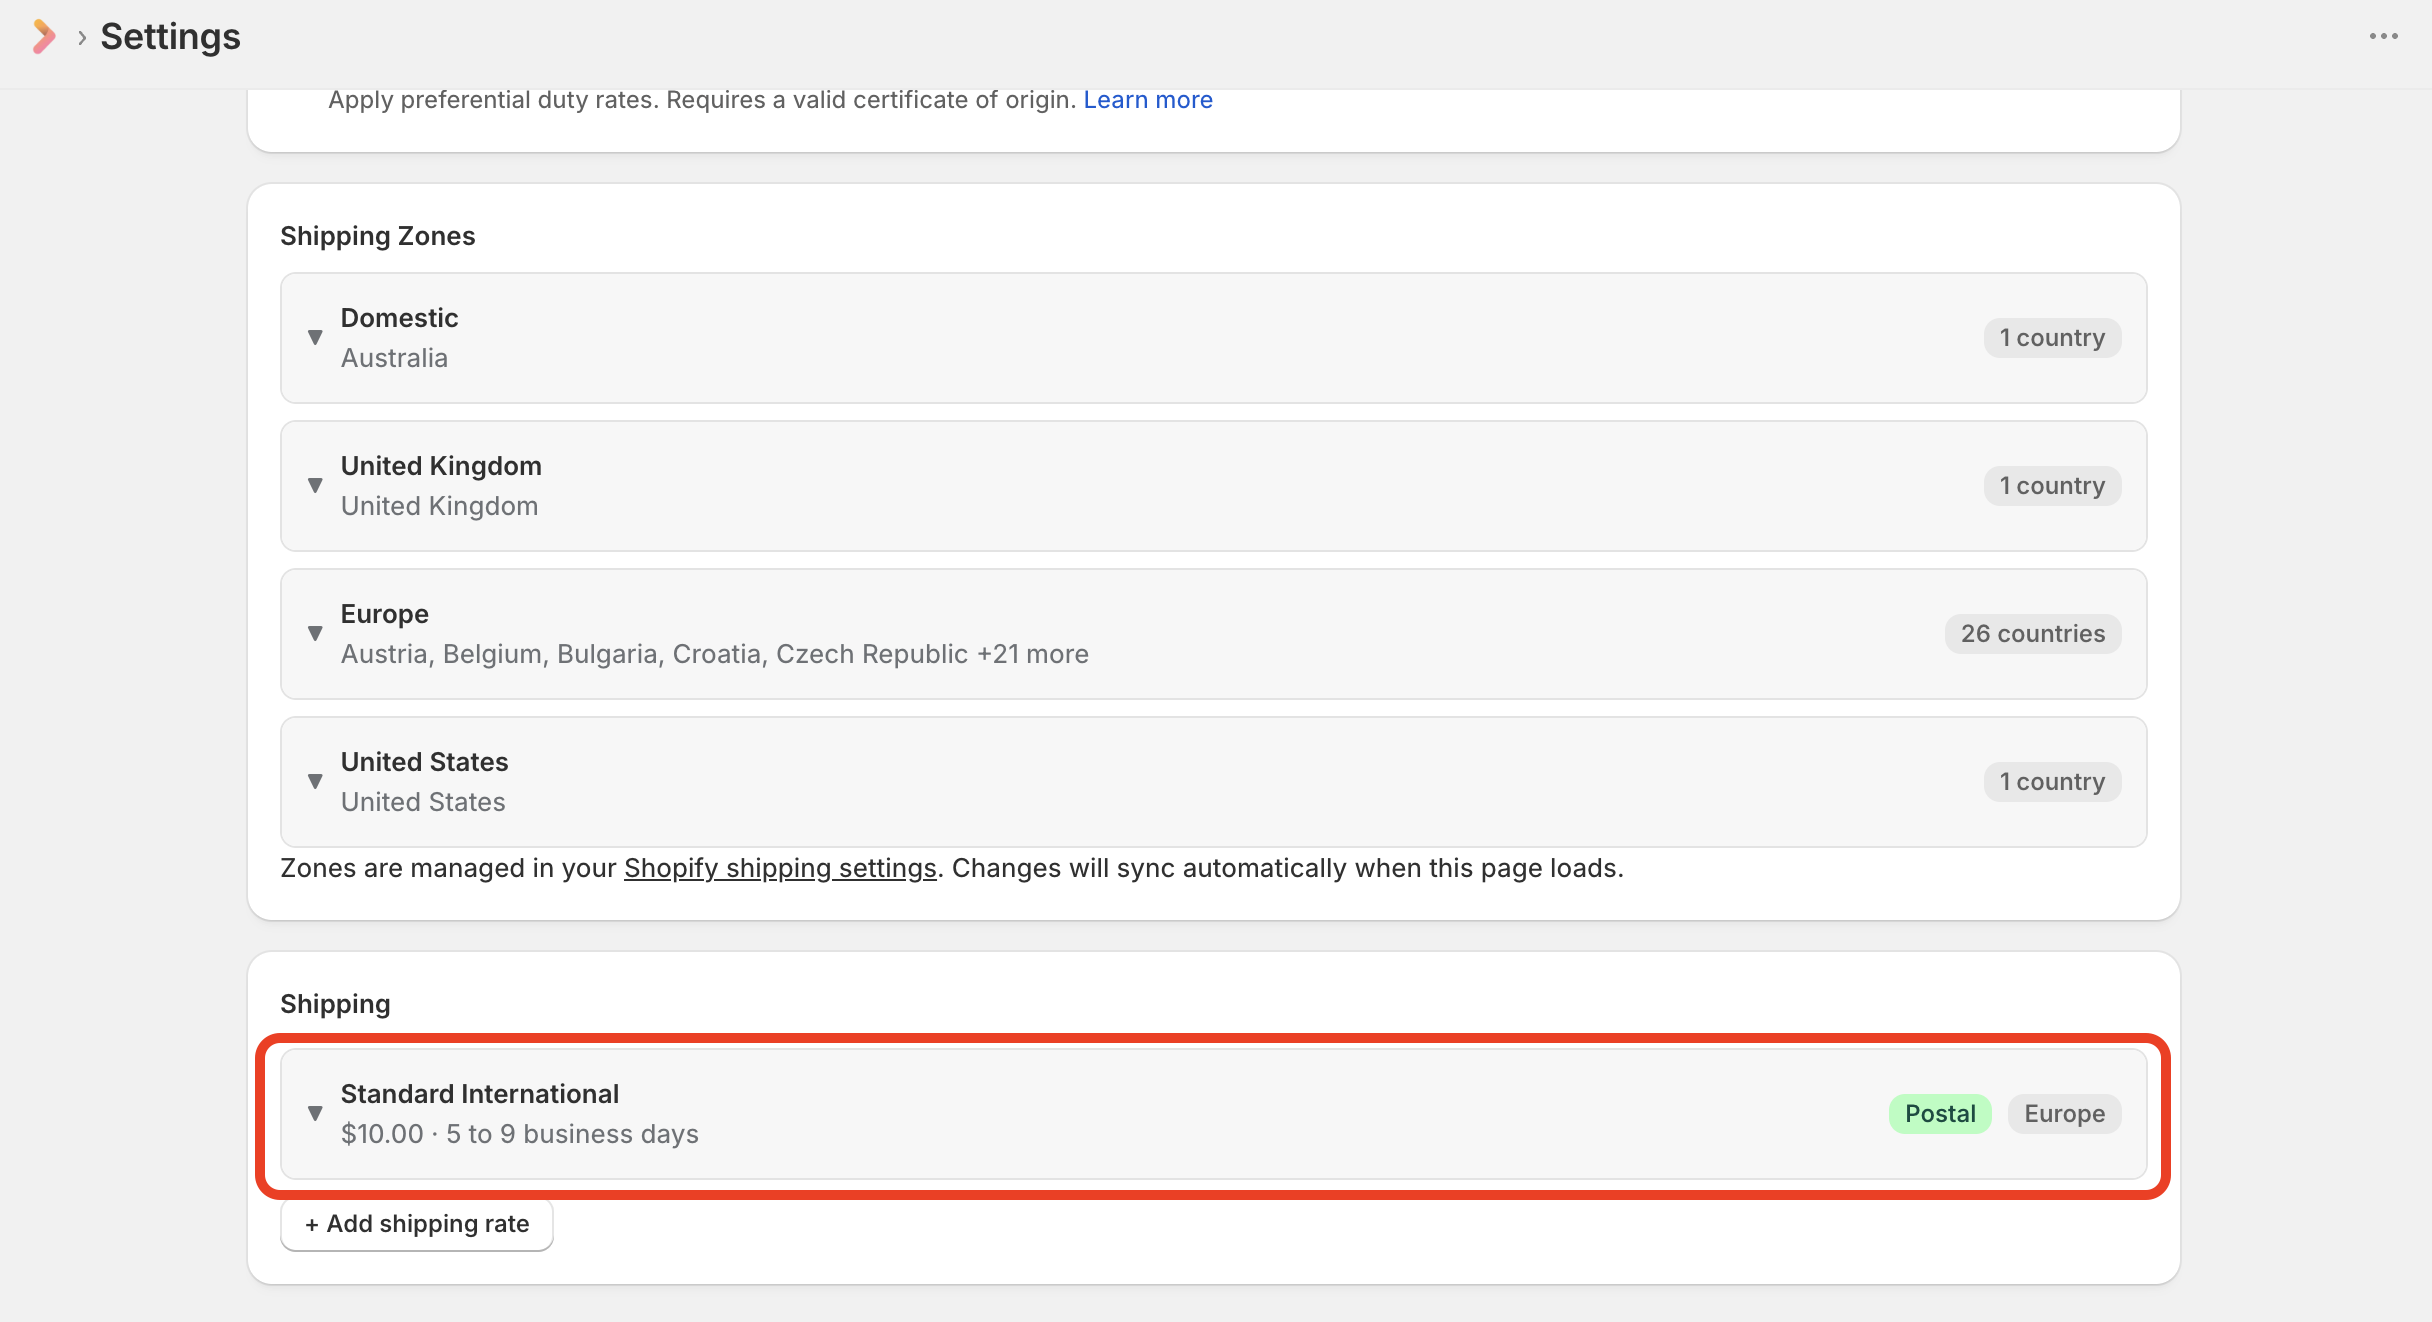
After saving the page, you should now see the created shipping rate under the Shipping section of the app settings page:
-
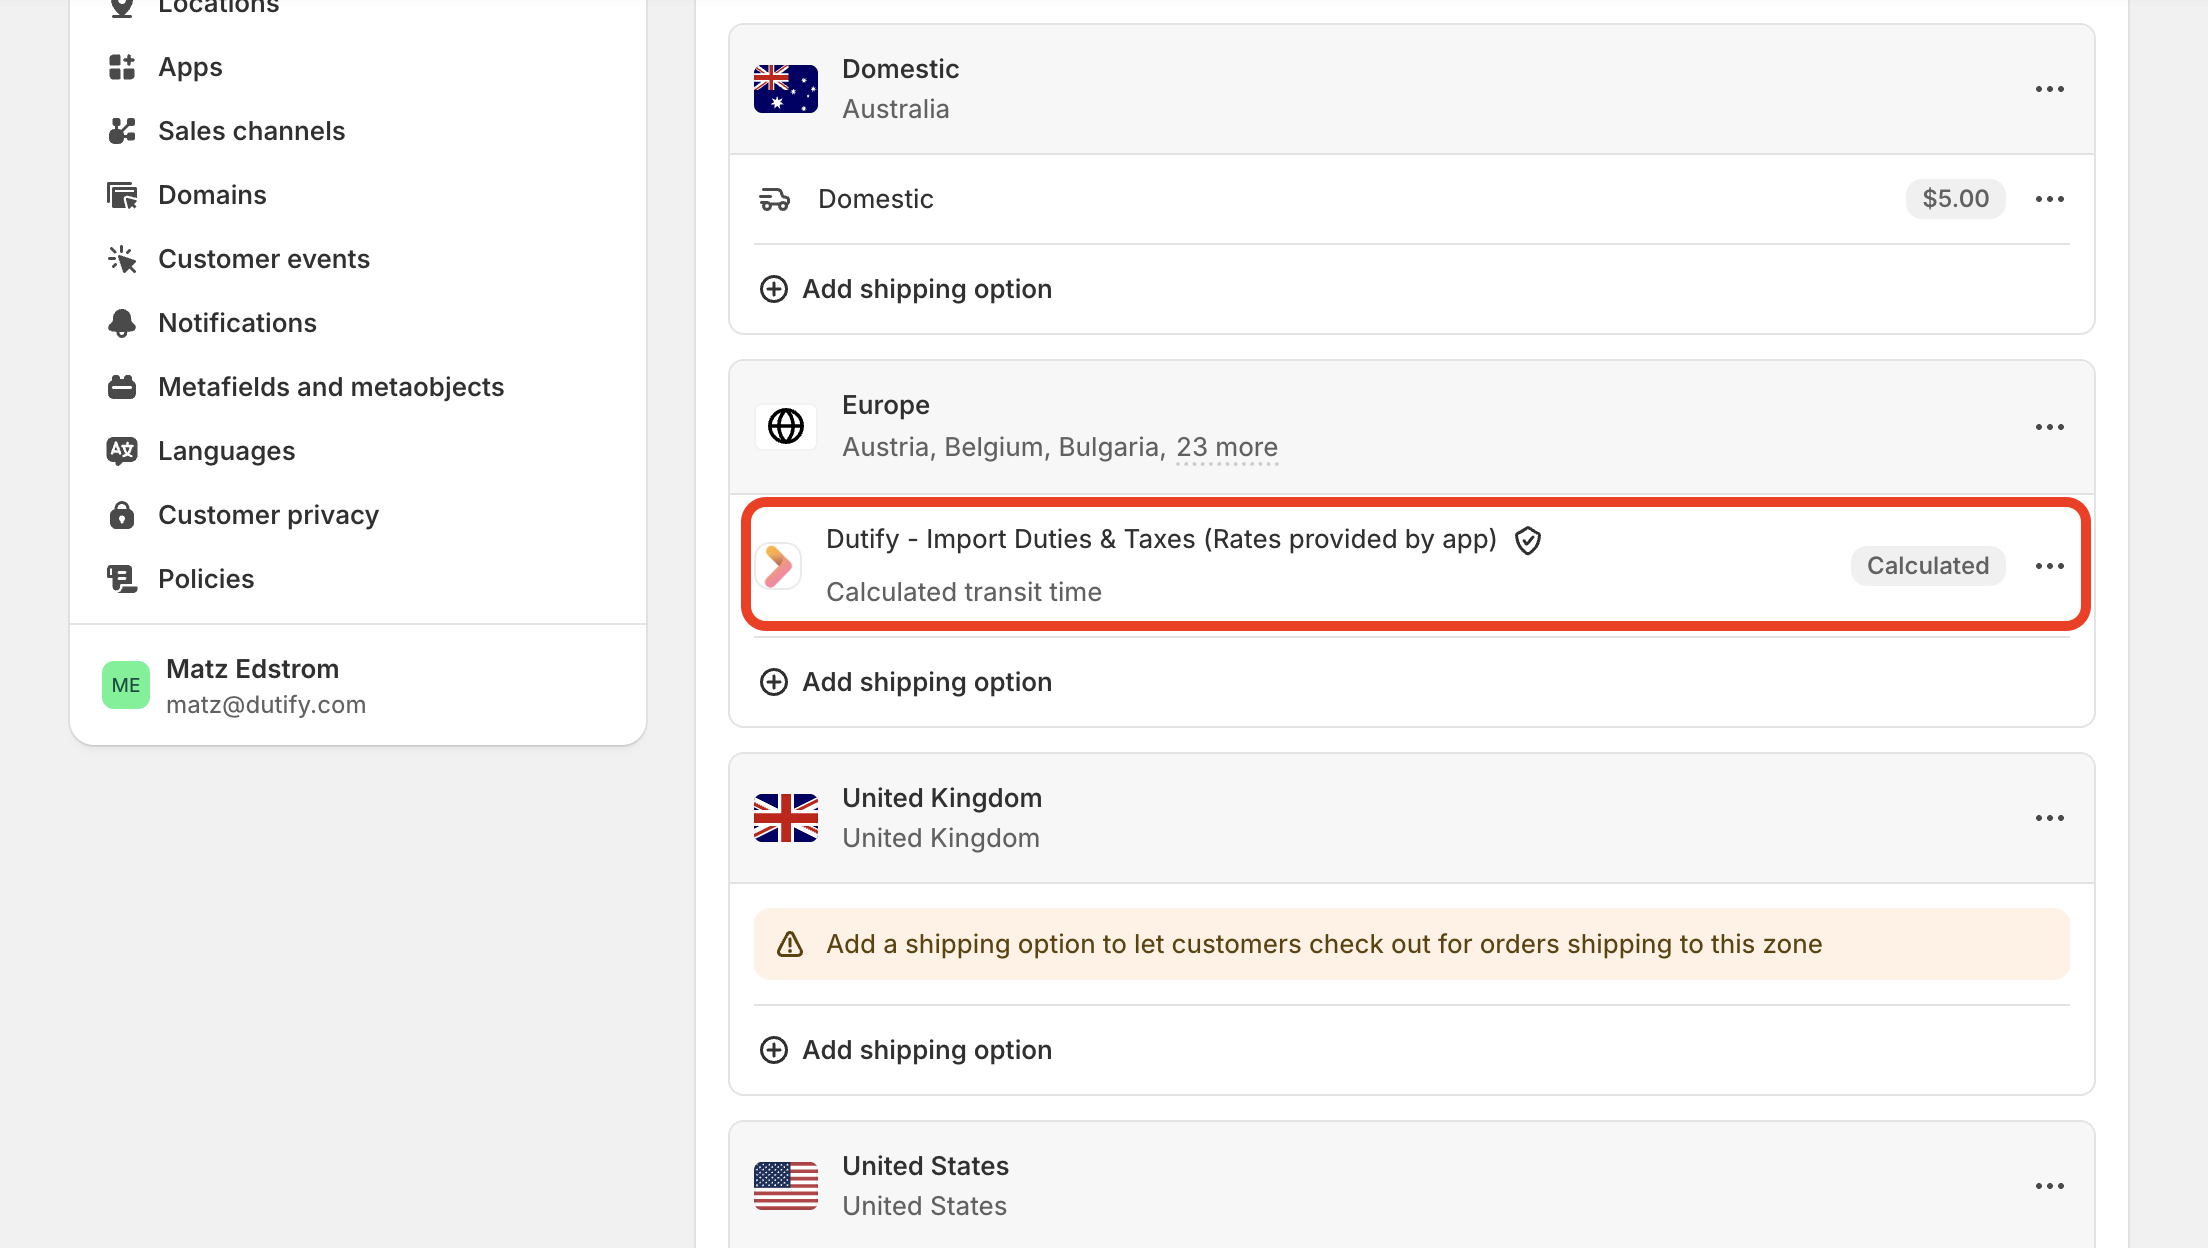
Head back to Settings > Shipping and delivery in Shopify admin and you should see your newly created rate under the respective shipping zone:
-
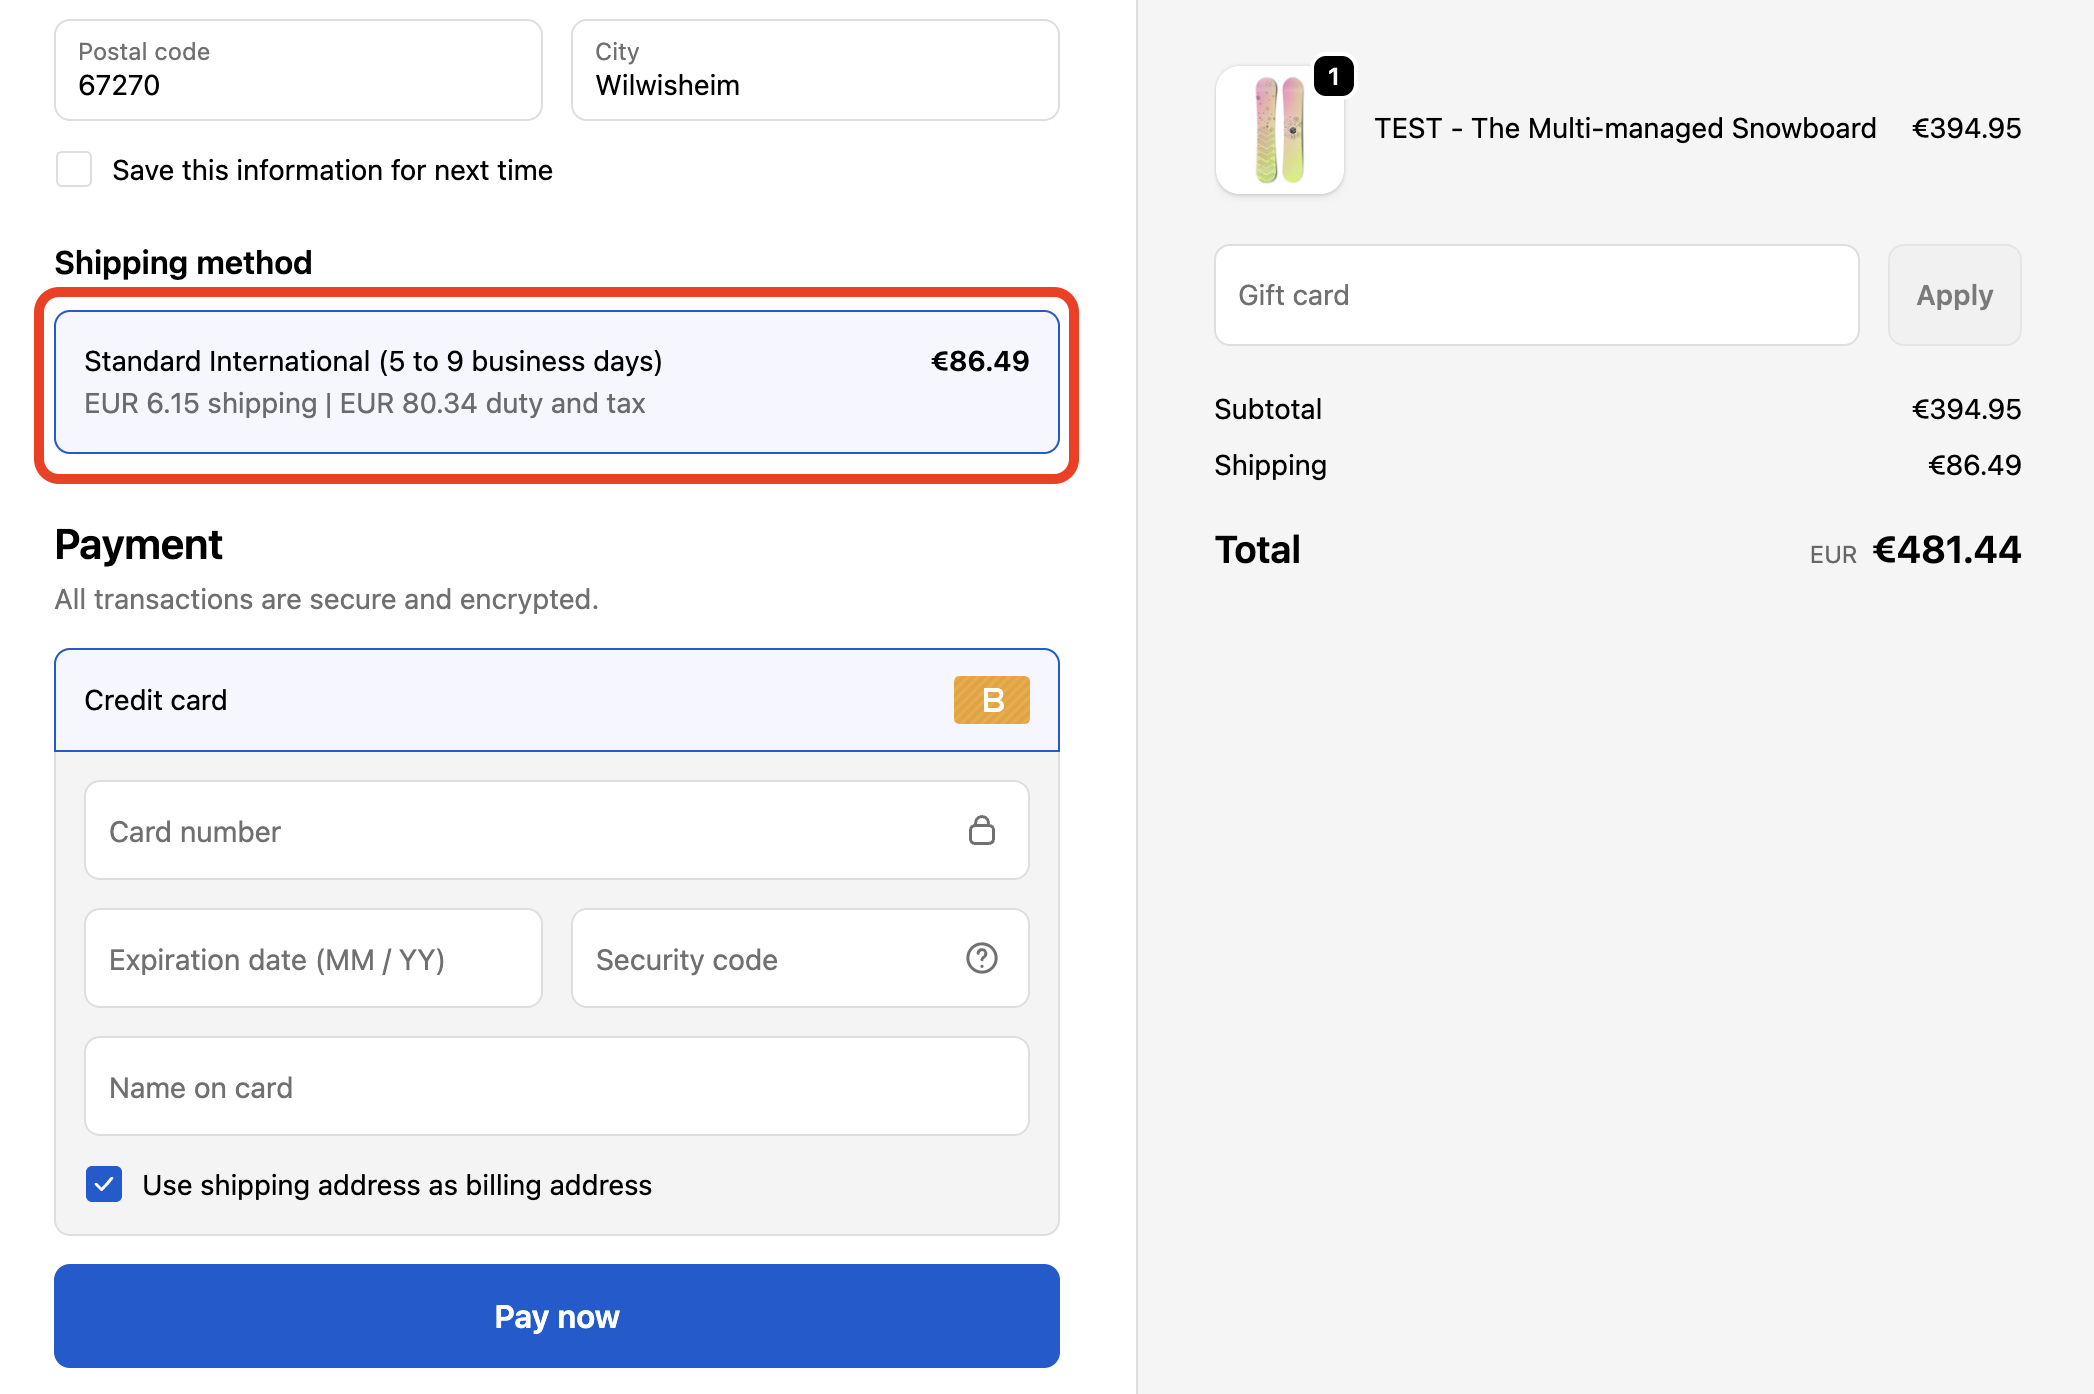
Finally, double check your checkout flow to confirm you're seeing the shipping rate:
Next, you will need to classify your products.